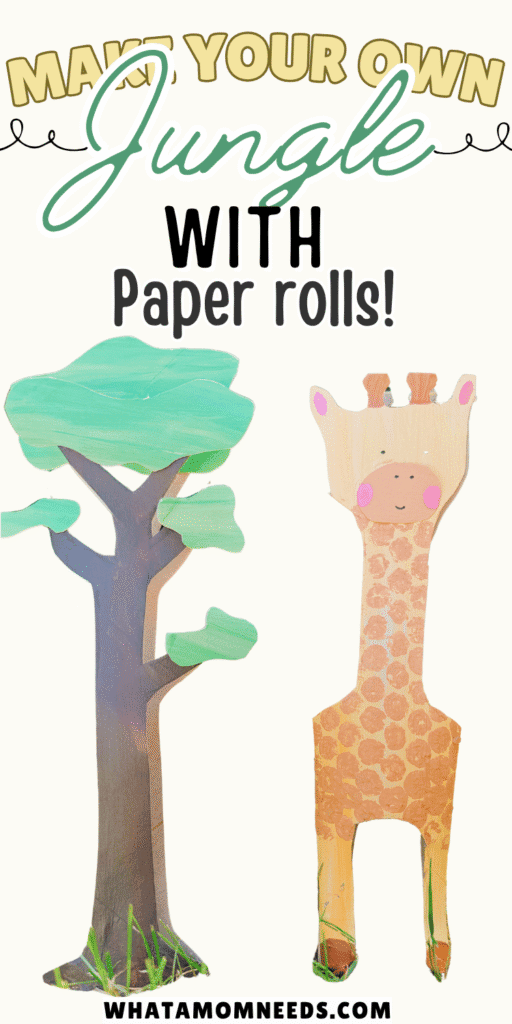
Giraffe Paper Roll Craft (with Bubble Wrap Spots!)
Okay but how fun is this?! We turned a few empty rolls into a jungle friend and a leafy tree—and the result is honestly SO cute.
If you’ve got a couple of paper rolls lying around (and maybe some bubble wrap from that last package you still haven’t put away), this giraffe paper roll craft is totally worth a try.
It’s the kind of project that’s perfect for a quiet afternoon with your kid, a jungle-themed play day, or just because you’re in the mood to make something adorable out of what would otherwise end up in the trash. Love that.
Let me show you exactly how we made it!
What You Need
- 2 kitchen rolls (empty paper towel rolls)
- 1 toilet paper roll for the tree leaves
- Brown, green, yellow, orange and pink paint (or whatever colors you love)
- Bubble wrap
- Paintbrush
- Scissors
- Glue
- Black pen or marker
Step-by-Step Instructions
1. Paint your rolls
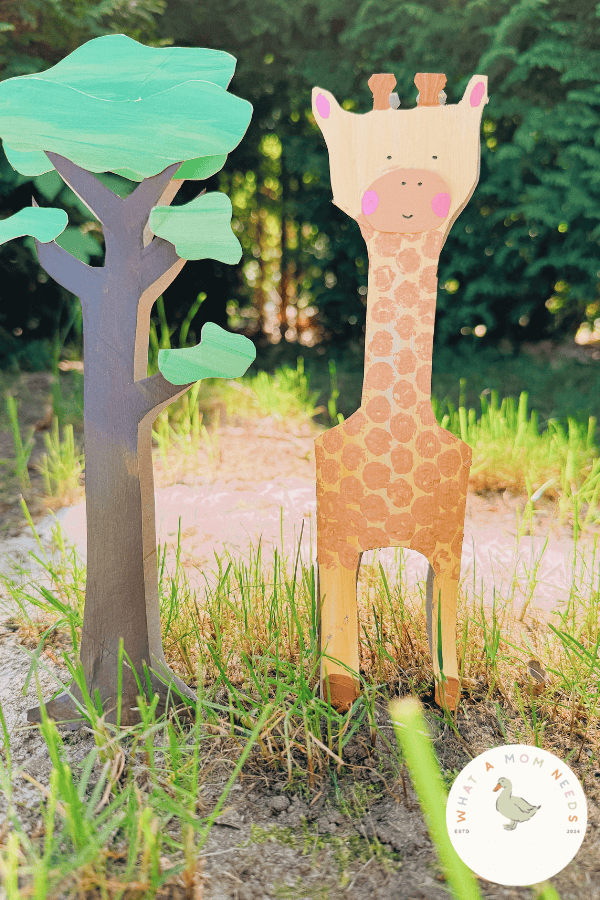
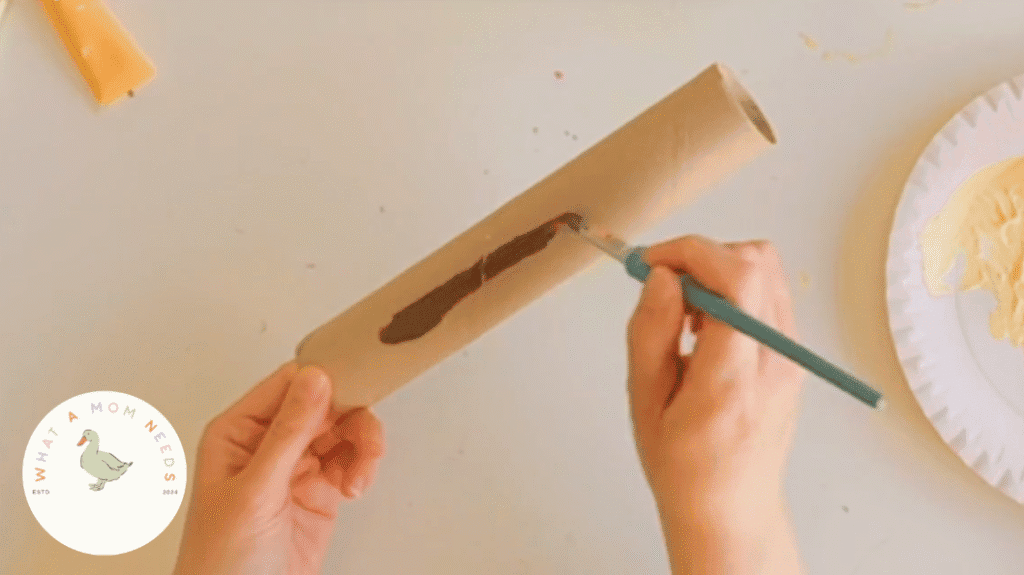
We used one kitchen roll for the tree trunk and painted it brown.
Another kitchen roll got a nice coat of yellow paint—this will become the giraffe.
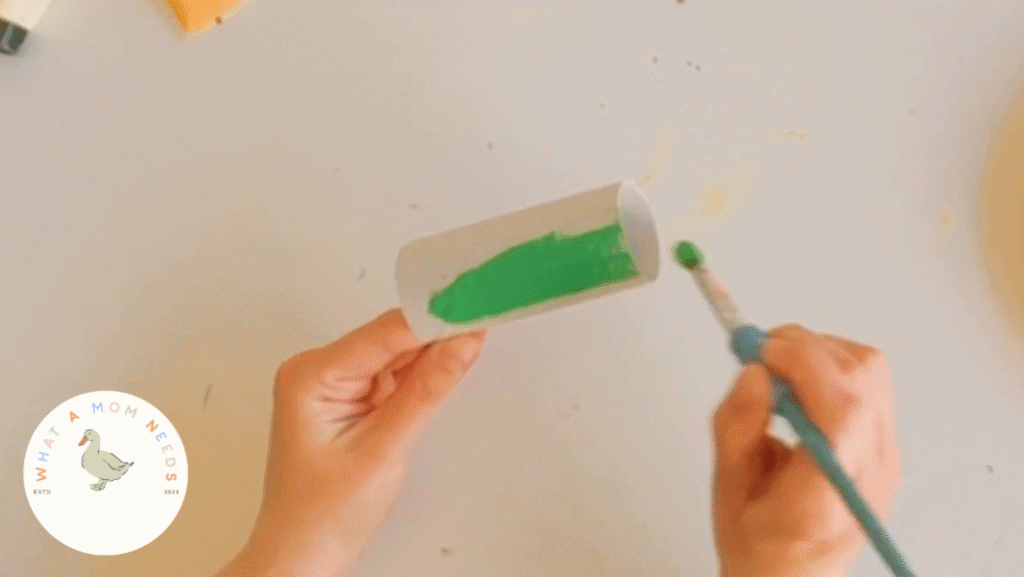
Then we painted one toilet paper roll green. These will be the leaves of our tree.
Let them dry completely before moving on (you can speed this up with a sunny windowsill or a bit of help from a hairdryer!).
2. Create your giraffe pattern
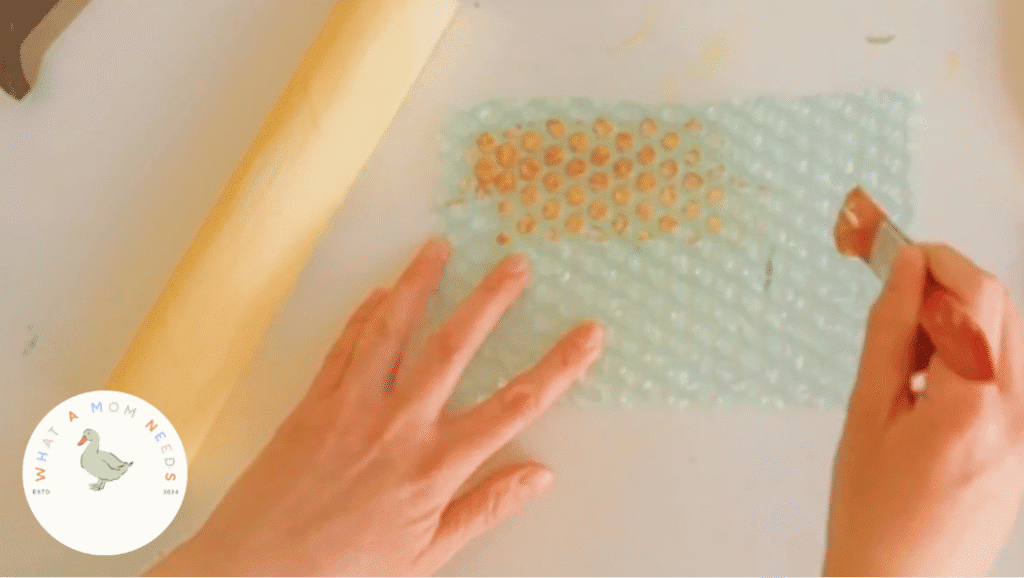
This part is SO satisfying.
Take a small piece of bubble wrap and paint it with orange-brown paint. Then gently roll your yellow-painted kitchen roll over it.
This gives it a perfect giraffe-spot effect without having to paint every little dot.
Let it dry.

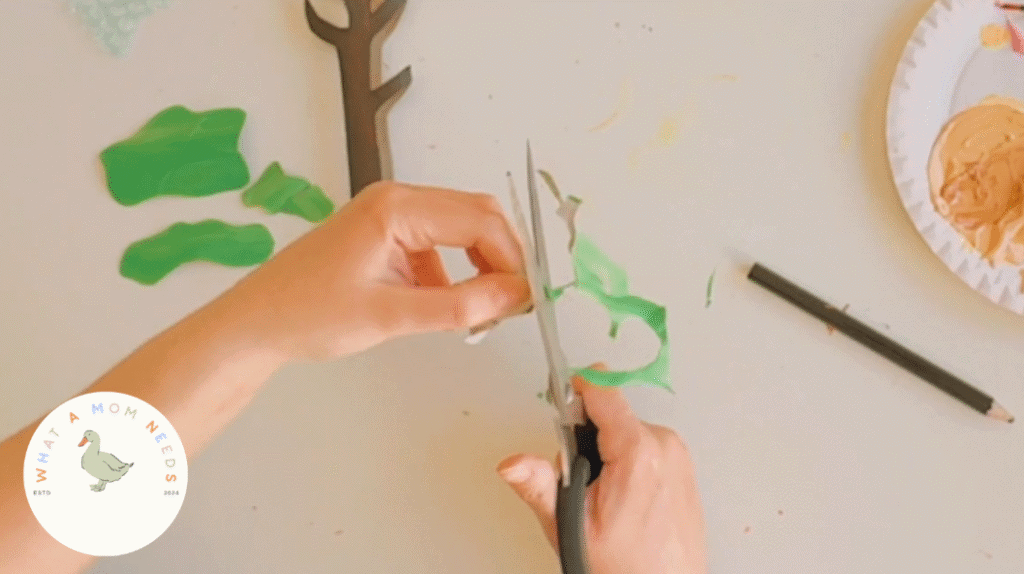
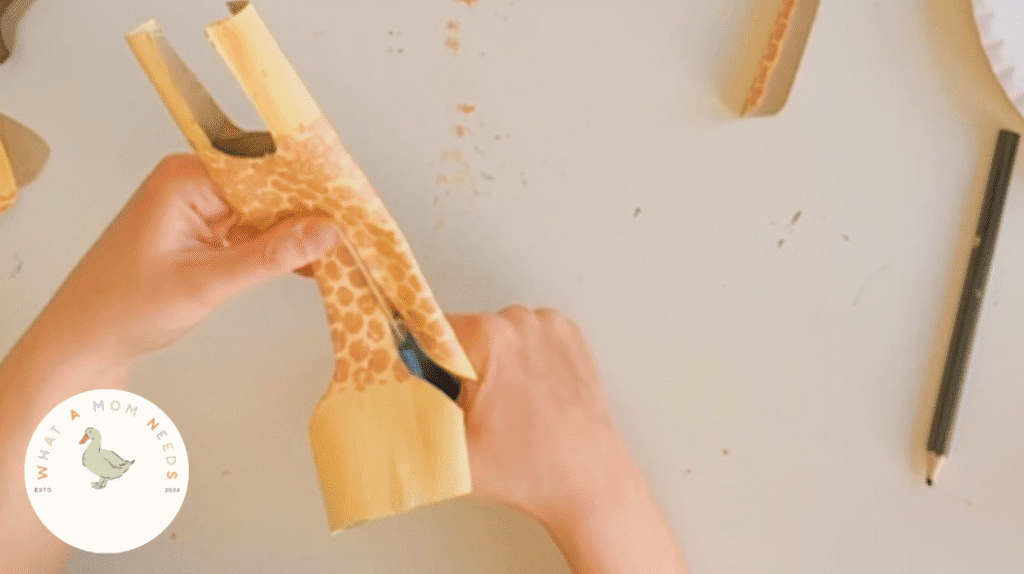
3. Cut out your shapes
Time to bring your animals and scenery to life!
Cut the brown kitchen roll into a tree trunk shape—you can keep it simple or give it a nice, wavy tree-like edge.
Then take your green roll and cut out big, fluffy leaf shapes. Glue them onto the top and sides of the trunk. Boom, you have a tree.
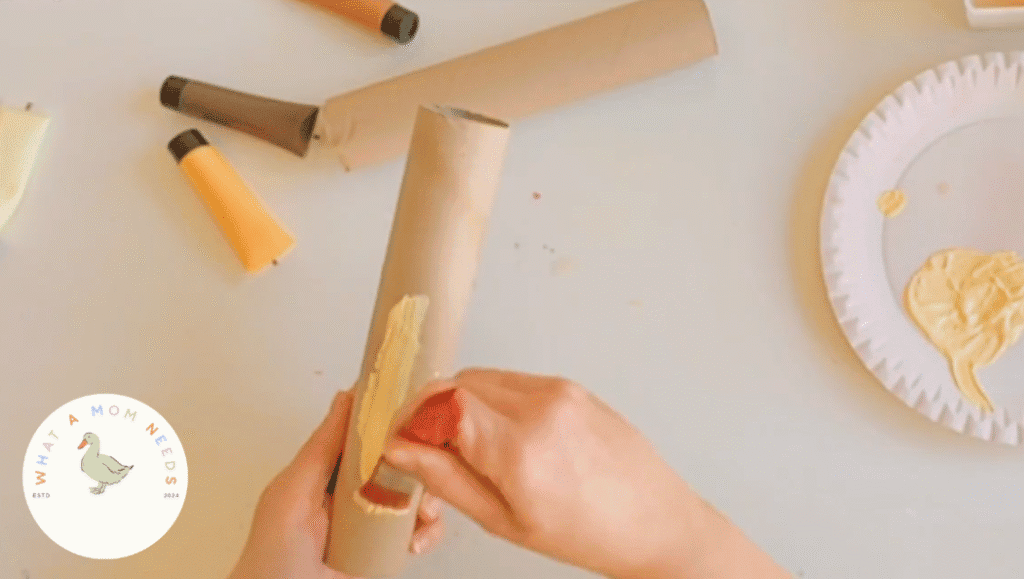
Now take your spotted yellow roll and cut out the shape of a giraffe. I made mine tall with little ears, a rounded snout, and some gentle curves.
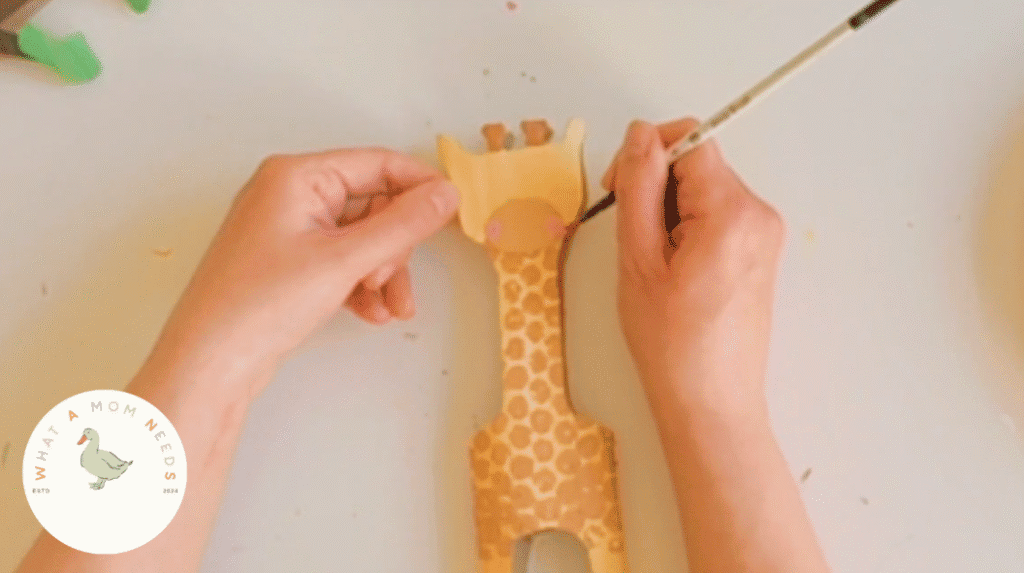
4. Add the face
This is where the personality comes in.
Use a marker or pen to draw two little eyes and a smile. I also painted on some pink cheeks and a beige snout.
Add ears and horns if you like (you can paint them straight on or glue on small paper pieces).
Why I Love This Craft
It’s simple. It’s cute. And it gives a second life to something you’d normally throw away.
You don’t need fancy materials or a Pinterest-perfect setup. Just a few rolls, a little paint, and some imagination.
Also… bubble wrap stamping? Totally therapeutic!
This giraffe and tree paper roll craft is one of those little projects that feels extra extra cozy. It doesn’t take much, but the result is something your child will proudly carry around, show to everyone, or set up for jungle play.
Happy crafting!
Like this post? Pin it to save for later!