Transform a simple bottle into a winter wonderland with this Christmas sensory bottle! It’s the perfect DIY to captivate little hands and minds.
This post includes affiliate links. If you purchase a product with the links that I provide I may receive a small commission. There is no additional charge to you. View the disclosure for more information.
I’ve made a really nice sensory bottle before using hair gel, and while it worked great, I recently discovered glycerin as an alternative. Honestly, it’s just as effective, and a little easier to work with!
Plus, it’s perfect for those festive Christmas sensory bottles your little ones will love. Ready to give it a try? Let’s get into it!
Scroll down to check out how my sensory bottle turned out and watch the glitter and sequins in slow-motion action!
Sensory bottles are magical! They help little ones relax, focus, and stimulate their senses, all while keeping their tiny hands busy.
The slow-falling glitter and sequins are not only mesmerizing but also help children develop visual tracking skills.
Plus, these bottles are super fun to shake and explore!
FAQ About Sensory Bottles
Why is my glitter clumping in sensory bottles? This can happen with certain types of glitter, but don’t worry—it’s an easy fix! A tiny drop of dish soap added to your sensory bottle can help prevent clumping.
How to thicken water for sensory bottles? Glycerin works wonders for thickening water, but if you run out, no problem!
You can also use a bit of clear glue to get the same effect.
Can I add heavy items to my sensory bottle? Yes, but be mindful! Heavier items will need more glycerin to slow them down. I’ve learned this through trial and error—trust me, less is more when it comes to heavy accessories.
What You’ll Need
Glycerin (You can find it in most pharmacies or online)
Water
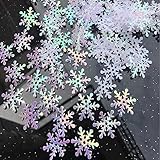
Sequins in Christmas colors (white, green, red, gold, silver)
Any small accessories you’d like (just remember, if they’re too heavy, they’ll fall fast unless you add a lot of glycerin)
Water bottles (You can order special sensory bottles online, but Voss water bottles work just as well—and they look fancy!)
Alcohol to remove any stickers if you’re using a regular water bottle
Superglue to seal the lid
Shop this post
Step-by-Step Guide to Making Your Christmas Sensory Bottle
Gather all your supplies – sequins, glitter, accessories, glycerin, water, and your bottle.
Fill 1/3 of the bottle with glycerin – This is how I do it, and you can see the result in the video at the end of this post. Adjust based on how fast or slow you want the items to move.
Add water – Leave about an inch or two of space at the top.
Add sequins and accessories – A little at a time, shaking the bottle to test how slowly they fall. Adjust as needed.
Fill the rest of the bottle with water – Once you’re happy with the speed, top off the bottle.
Seal the bottle – Use super glue around the lid to keep little hands from opening it (or glitter going everywhere!).
Shake and enjoy! – Your Christmas sensory bottle is done!
Christmas Sensory Bottle
5.0 Stars (1 Review)
A fun and easy Christmas sensory bottle to bring holiday sparkle and sensory play into your home!
Any small accessories you’d like (just remember, if they’re too heavy, they’ll fall fast unless you add a lot of glycerin)
Glue (to seal the lid)
Alcohol (to remove any stickers if you’re using a regular water bottle)
Tools
Funnel – helpful for pouring water and glitter neatly into the bottle
Glue Gun or Strong Glue – to securely seal the lid and prevent leaks
Instructions
Gather all your supplies – sequins, glitter, accessories, glycerin, water, and your bottle.2
Fill 1/3 of the bottle with glycerin – This is how I do it, and you can see the result in the video at the end of this post. Adjust based on how fast or slow you want the items to move.3
Add water – Leave about an inch or two of space at the top.4
Add sequins and accessories – A little at a time, shaking the bottle to test how slowly they fall. Adjust as needed.
Fill the rest of the bottle with water – Once you’re happy with the speed, top off the bottle.
Seal the bottle – Use super glue around the lid to keep little hands from opening it (or glitter going everywhere!).
Shake and enjoy! – Your Christmas sensory bottle is done!
Notes
If you want the glitter to move more slowly, add a small amount of glycerin to the water.
For added fun, try using different themed decorations like mini snowflakes, stars, or holiday buttons to match your personal style.
Warning: Always supervise young children while using the sensory bottle.


![6-Pack Bulk Empty Plastic Juice Or Water Bottles with Caps Reusable 400ml Durable Smoothie [Bottle]s with Black Lids Great Calming great for [Sensory] Crafts](https://m.media-amazon.com/images/I/41SZToLqAEL._SL160_.jpg)